I've been doing lost wax casting on the cheap for years with the following tools and relatively simple equipment. Most of my work has been with sterling silver, from simple shapes to wedding and engagement rings.
This is not a comprehensive guide, I'm no expert, these are not recommendations, just sharing some of my experiences and results.
Pattern Making:
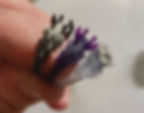
My go-to is resin printing with Siraya Tech's Cast Purple on an Elegoo Mars 2. It gives excellent detail and great for iterative design. Used the same bottle of resin for over two years. The resin printer is also great for making test pieces like the one holding the diamond.

PLA printing: For simple objects as FDM resolution is generally limited, but a 0.2mm nozzle helps.
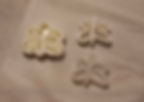
Paraffin and beeswax, I prefer to make a master part and a reusable silicone mold for making duplicates. The silicone mold can be made from caulk.
Metal Melting:

I've done most of my casting with a Bernzomatic T8000 torch head and Map-Pro gas.

A proper jeweler's torch with a wide head using oxy-propane is a pleasure to work with.

Regular propane can be used but can take forever to melt the metal. A firebrick enclosure like this can help speed things up and also shields from wind.

If you're looking for something far out you can use a TIG torch with argon to melt metal in a graphite crucible on a grounded table.
Crucibles:

Alumina crucibles are cheap, long lasting, and easily glazed with borax. Steel wire or an old coat hanger make for a decent handle, lab tongs work too.

In a pinch a 50/50 mix of plaster and sand cast onto a steel wire handle can make a simple crucible. They don't last long and are difficult to handle.
Burnout of Molds:

A propane grill set on high for an hour has worked just fine for me, but the surface finish leaves something to be desired. I took out the grill rack and rested the flask down on the flame shields to get higher temperatures.

Cheap toaster ovens can be insulated with regular glass insulation. I've gotten good results with a two hour burnout on high.

A proper kiln with PID control and a fume hood is great for running the 13 hour recommended burnout works fine if you have access.

If you're looking for excessive frustration and enjoy gambling you can torch molds by hand.
Investment:
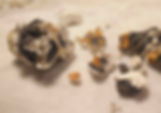
Proper investment is a good investment, I like Prestige ORO. However I've gotten away with regular plaster too as seen above with a fine silver gravity cast.

It's recommended to vacuum investment after mixing to remove bubbles. However I've gotten decent results without and by doing a thin-stream-pour onto the wax.
Flasks and Bases:

Regular steel pipe makes for a cheap and durable flask. If its galvanized don't huff the zinc fumes when it burns out. Modeling clay makes for a great reusable sprue base for holding your patterns and stems.

Steel food or paint cans with their ends cut off work, but they rust and wear out quickly.

I have used aluminum flasks, but only for lost PLA with regular plaster in a kitchen oven burnout. The aluminum's expansion and shrinkage can unseat the investment.

The reusable silicone sprue base seen before can be made in a 3D printed mold with bathroom caulk. Remember to use a release agent like wax or Vaseline on the 3D print.
Vacuum Setup:
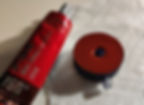
I resin printed this base and topped it with high temp RTV silicone. The hot flask sits atop the silicone and the barb attaches to a vacuum line, allowing the atmosphere to push the metal into the mold.

A cheap vacuum pump with vinyl hose shoved over the fitting works fine. In a pinch you can even use motor oil in the vacuum pump.
Results:

3D printed resin, proper investment, toaster oven burnout, vacuum cast.

Lost PLA, regular plaster, kitchen oven burnout, vacuum cast.

Notes:
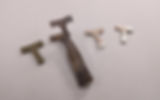
Left to right: PLA print, silver cast with vacuum, silver cast without vacuum. All in regular plaster with kitchen oven burnout.
Lost PLA, no vacuum, regular plaster, torch burnout. Not exactly detailed, but workable with some elbow grease.


